Creating a Social Media Post
If you haven't already done so, please watch our social media integration tutorial:
Shockwave Tutorial
MP4 Tutorial
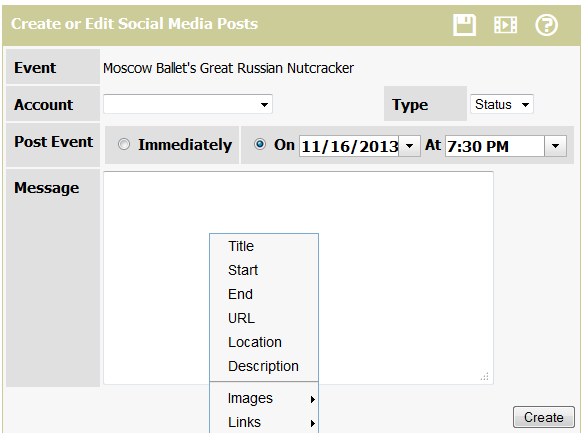
Once you create your event in connectDaily, you can post to your social media accounts about your event. To create a post, go to the Edit Event screen and click on the Social Media Icon. The Create or Edit Social Media Posts form will appear.
From the Account List, select which Social Media Account you wish to post to.
The Type dropdown lets you select the type of post you wish to create. For Facebook, a status update is the simplest and least flexible. A Post is the most complete.
You can choose to post the event immediately, or at some time in the future. See the comments below for more information about this.
The form lets you fill in the various fields and URLs associated with the selected post type. For the status example below, you would type in a subject and message. If you right-click on the input boxes, a pop-up menu will appear that lets you directly paste in the values from the event. For example, you can right-click and paste in the Location.
For the various URL inputs, you can select a URL from the dropdown list, or type in a different URL. connectDaily will find all of the URLs in your event, and put them in the dropdown list for you to choose. The same holds true for Image URLs.
Once you've got your post ready to go, click on the Create Button. Once the event is created it will be displayed in a list underneath the form.
Here are some things to know:
All Types
- If you delete the event, and there is a scheduled post, that scheduled post will be deleted.
- If you delete the event, and the scheduled post has already been created but not published on the social network, it will be deleted.
- If you delete the event, but the post has already been published on the social network, it will not be removed from the social network.
Facebook Pages
- If the post is a future/scheduled post, you can view the future posts in Facebook by Choosing Edit Page | Use Activity Log, and examining the Scheduled Posts section.
- Facebook doesn't provide a way for you to edit the scheduled posts, but you can use connectDaily to edit the post if you notice an error.
- Once the post becomes published, connectDaily will not allow you to edit it, but you can delete it.
- You can delete the scheduled post using the Facebook interface if desired.
- One of the strange things we've noticed about Facebook pages is that if you have multiple admins, you cannot view each other's scheduled posts in the Activity Log section.
Facebook Accounts
- Facebook Accounts do not support scheduled posts, so connectDaily will hold them internally until the designated time and then post them to your account. The time will be within 5 minutes of the designated post time.
- Once the post becomes published, connectDaily will not allow you to edit it, but you can delete it.
Twitter
- Twitter does not natively support scheduled posts, so connectDaily will hold them internally until the designated time and then post them. The actual post time will be within 5 minutes of the designated time.
- The maximum length of a tweet is 140 characters. URLs regardless of length consume 22 characters. Because Twitter internally shortens URLs, use of an external URL shortening service (e.g. bit.ly) will have no effect. If you try to save a post that exceeds this limit, connectDaily will throw an error.